Content

Friday, January 29, 2016

How to setup DNS entries for big data servers in the cloud or not on a domain in /etc/hosts file?

IMPORTANT:
a. Do not do this if the servers are already in domain and DNS is already handled by a dedicated DNS Server.
b. Its always better to assign static IP for the servers before doing these changes so that we don't chain the DNS entries every time the host machine IP changes due to restart.
c. You need to be an administrator to perform these changes.

Now that we have created these servers which are on the virtual network and have only an IPV4 number. We need to make sure that these machines in  the network are accessible by its host name.

Most of the big data clusters need not be managed by a domain controller and can exist as standalone in the cloud or in your own virtualization host.

On each of the clusters the DNS entries for the other nodes that it uses in the cluster needs to be set in the /etc/hosts file.
For those clusters which are interacting with other clusters then the DNS entries needs to be set for all the other clusters the current cluster interacts with.

e.g
If we have a Elastic Search 3 node clusters then on each of the 3 node cluster we need to setup the DNS entries in /etc/hosts file

sudo vi /etc/hosts

Insert the following records and save on all the clusters. Keep the localhost entry as it is and append to it. (You can insert with the comment using the #)

# Elastic Nodes
192.168.0.6 SEARCHNODE1
192.168.0.7 SEARCHNODE2
192.168.0.8 SEARCHNODE3


if we have an Apache Storm 3 node clusters which inserts data to any of the Elastic Search clusters then on each of the Storm cluster we need to have both the entries for Storm nodes as well as the Elastic Search nodes.

sudo vi /etc/hosts

Insert the following records and save on all the clusters

# Storm Nodes
192.168.0.10 STORMNODE1
192.168.0.11 STORMNODE2
192.168.0.12 STORMNODE3

# Elastic Nodes
192.168.0.6 SEARCHNODE1
192.168.0.7 SEARCHNODE2
192.168.0.8 SEARCHNODE3


Verify if its working by doing the following command

ping STORMNODE1

cancel by  ctrl + c

You should not get any dropped packets.
How to turn off firewall on CentOS 7?

Important:
Do not turn off firewall in Production and Pre-production servers. Figure out the ports to open for all the technologies that run in the server and open these rules in firewall.

In Developer Box, Developer Instance and QA Instance environments its safe to turn off for quick deployment.

You need to be an administrator to perform these changes.

//check the status of firewall
sudo systemctl status firewalld

//stop the firewall
sudo systemctl stop firewalld

//disable firewall so that it doesn't start again when restarted
sudo systemctl disable firewalld

Thursday, January 28, 2016

How to install Java 7 and Java 8 in CentOS 7?

Java has three concepts

1. Versions like 1.7 , 1.8 which are also called Java 7 and Java 8
2. Various distributions like JRE, JDK, etc
3. Vendor distributions i.e the Oracle distributes or OpenJDK distributes.

In the Development machine install the JDK which also has the JRE.
In Server machines install only the JRE.
If there is an Open JDK version available for your OS use this else take the Oracle one.
Since there is an OpenJDK version for CentOS we shall install this distribution.

CentOS 7 Server with UI should come pre-installed with Java 7 JRE.

Check if Java is already installed by issuing the following command.

java -version
It should print out

java version "1.7.0_79"


Yum is the package manager in CentOS (Windows installer in Microsoft). It can auto detect if java is already installed and install only if its not.

Install Java 8 (1.8) JDK using the following command. You need to have admin privileges.


sudo yum install java-1.8.0-openjdk-devel.x86_64


If already installed you would get

Loaded plugins: fastestmirror, langpacks
Loading mirror speeds from cached hostfile
* base: mirror.5ninesolutions.com
* extras: mirror.millry.co
* updates: mirror.cogentco.com
Package 1:java-1.8.0-openjdk-devel-1.8.0.65-2.b17.el7_1.x86_64 already installed and latest version


Check the installation by using the following command. which list any java processes running. This is available only in the JDK version and not on the JRE version

jps


Install Java 8 (1.8) JRE using the following command. You need to have admin privileges.

sudo yum install java-1.8.0-openjdk.x86_64


Don't bother about the naming convention its called openjdk, this is a company name but installs the JRE.

If Java 7 is not installed and you got a server core version of CentOS 7.

Then issue the following  commands before you install Java 8

//install the java 7 JRE
sudo yum install java-1.7.0-openjdk.x86_64

//install the java 7 JDK
sudo yum install java-1.7.0-openjdk-devel.x86_64


Wednesday, January 27, 2016

How to build an Apache Storm 0.10 topology job in Eclipse using Maven?

The following is the process of building an Apache Storm 0.10 Topology Job.

Technologies used:
a. Apache Storm 0.10
b. Eclipse Mars
c. Apache Maven 3.3.9
d. Java 7 or Java 8

1.You need to have two environments to build Storm Topology.
Environment 1: Developer Box
Environment 2: Development / Build Box

IMPORTANT: The changes you are going to make if done in Developer Box would render the running the topologies on the local Storm cluster broken.

2.Remove the jars that Storm already provides.
Remove Storm jar and Logging Jar like Log4j2
Go to the project pom.xml that has the Storm jar reference and add the following so that this jar is not including when we compile to a single jar with dependencies.


    <dependency>
      <groupid>org.apache.storm</groupid>
      <artifactid>storm-core>/artifactid>
      <version>0.10.0</version>
      <!--  This need to be enabled for storm submit job --> 
      <scope>provided</scope>   
    </dependency>

    <dependency>
      <groupid>org.apache.logging.log4j</groupid>
      <artifactid>log4j-api>/artifactid>
      <version>2.5</version>
      <!--  This need to be enabled for storm submit job --> 
      <scope>provided</scope>   
    </dependency>

    <dependency>
      <groupid>org.apache.logging.log4j</groupid>
      <artifactid>log4j-core>/artifactid>
      <version>2.5</version>
      <!--  This need to be enabled for storm submit job --> 
      <scope>provided</scope>   
    </dependency>   

3. Packing the project into a single jar with dependencies.
Go to the maven project that has the main method. Edit the pom.xml to have the following.
below the <dependencies> node.
  </dependencies>
  <build>
  <plugins>
<plugin>
<artifactId>maven-assembly-plugin</artifactId>
<configuration>
<archive>
<manifest>
<mainClass>com.yourcompany.yourproduct.yourproject.App</mainClass>
</manifest>
</archive>
<descriptorRefs>
<descriptorRef>jar-with-dependencies</descriptorRef>
</descriptorRefs>
</configuration>
<executions>
<execution>
<id>make-assembly</id>
<phase>package</phase>
<goals>
<goal>single</goal>
</goals>
</execution>
</executions>
</plugin>
  </plugins>
  </build> 

4. Issue the following Maven command and copy the jar with dependencies in the target folder.

mvn package
Note: you would have both the jars, copy the one with the following name appended like yourproject-1.0.0-jar-with-dependencies.jar

5. Follow the instruction for the next step of submitting the Storm Topology Job

How to submit an Apache Storm 0.10 topology job?

The following is the process of submitting an Apache Storm 0.10 Job.

1. Build your project or projects to a single jar in your local development environment. Refer How to build an Apache Storm 0.10 topology job in Eclipse using Maven?


2. Make sure that you have absolute paths for the configuration files. The preference would be to use Hadoop dfs so that the configuration file can be read by any worker "Supervisor" node. If you can't build with a path is common to all the users i.e under /var/local/storm/ . Do not put this under the user directory like /home/username or /Users/username

3. Make sure the file spout uses absolute path that is common to all users as discussed in step 2.

4. Copy the jar along with the supporting files for config and data files to the Storm master "Nimbus" node.

5. If you do not have Hadoop dfs, then you need to copy the config files and supporting data files to the common location, a common location would be

/var/local/storm/config - for config files
/var/local/storm/topology/topologyname/files and jars

IMPORTANT: you need to copy the supporting files not the jars to all the worker (Supervisor) nodes in the same path. The master (Nimbus) would not copy the supporting files to the worker nodes.

6. Make sure that storm is configured in your path so that you can execute storm command.

7. You can submit a storm job for any other user than the storm cluster is currently running. The only requirement is that the files that you specify should be readable from all the worker nodes in relative paths as well as the storm while submitting the job.

8. Execute the following command from a terminal by first changing directory to the folder that has the jar.


storm jar yourproject-1.0.0-jar-with-dependencies.jar com.yourcompany.yourproduct.yourproject.App "server" "/var/local/storm/config/config.json" "/var/local/storm/topology/yourtopology/topologydatafile.json"


IMPORTANT:
The best practice is to have the first parameter as either local or server to switch execution from a local storm cluster or a production storm cluster.

Do not put a quote or a dash (-) in the command for the jar or the main class name. This is not the same as the java -jar "jarpath" command.

You have to put quotes for all the parameters (arguments) that go into the main class.


9. Go to the Storm UI and check if your job has been submitted and track its status.
http://yourmaster(nimbus)node:8080/


Wednesday, January 20, 2016

How to install CentOS 7 on Virtual Machine using VMWare vSphere 6 client?

Now that we have created a Virtual Maching containing the CentOS installation media in the previous class. We can go ahead an now install teh CentOS 7 in the virtual machine (VM).

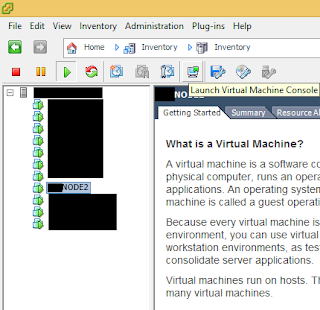
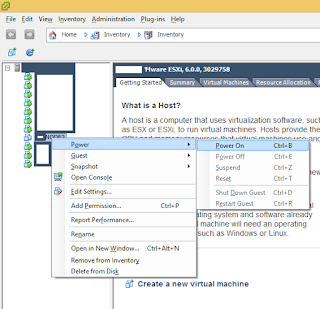
1. Go to the VMWare vSphere 6 client and select the VM , do a right click and start the VM.


2. Now we need to launch the VM so that we can see it in console. On the vSphere client you would see a terminal with an arrow icon. Click on it to launch the VM console.

3. Inside the console you can use "Alt" + Enter to toggle the mouse between VM and your desktop.
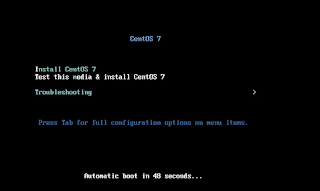
After clicking on the VM Console press the 'I' key to start the installation or use the arrow keys and press enter.


4. After a few minutes you would be presented the CentOS 7 installation start page.


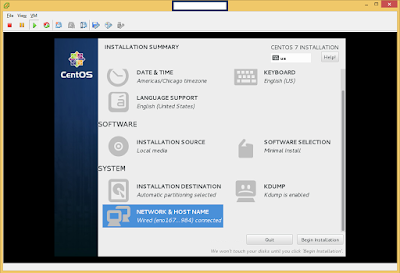
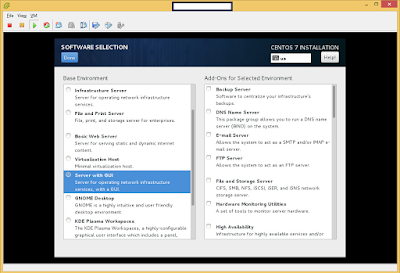
5. We can set these properties in any order. The important thing to note is that the Software selection is a minimal install so you won't get a UI, you need to change it to Server with UI to be able to use the UI.


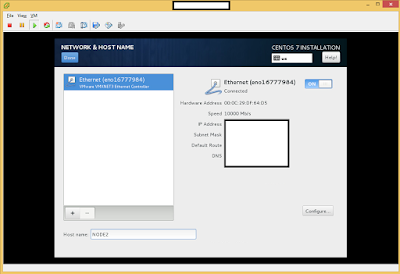
6. Setup Network by just sliding the bar to the on position. Make sure that you give a name to the machine in host name instead of the default. Make a note of the IP.


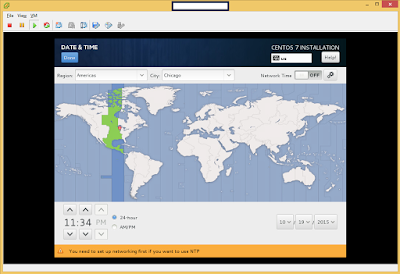
7. Setup the Date and Time. If you have setup Network first you can enable the network time else we could also do it later.


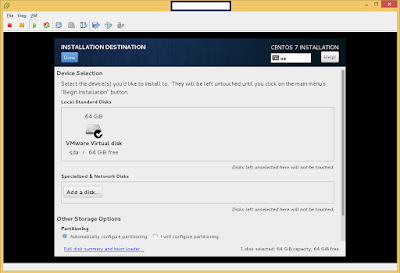
8. Setup Disk by just clicking on the disk icon


9. After all this is setup, click on the "Begin Installation" on step 4.
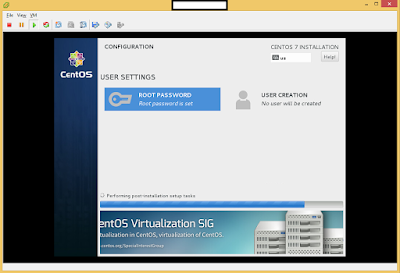
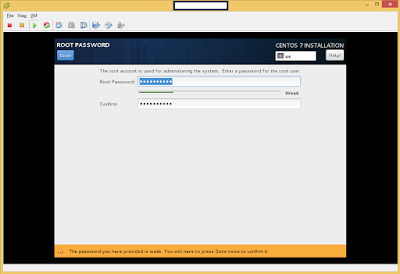
This would show the progress as well as ask you to create the root user password and other users.


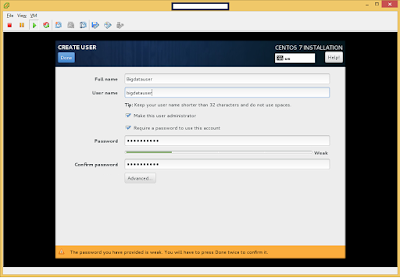
10. Do create another user who is an admin/root and do not use the root user for any of the interaction.


11. Create another Admin user, make sure you check the "Make this user administrator"


12. After installation is done it would ask you to reboot and you are can now either login through the console or use any SSH compliant client like putty or console in other Unix based OS and login to the VM using the IP on setup 6.