Now that we have created a Virtual Maching containing the CentOS installation media in the previous class. We can go ahead an now install teh CentOS 7 in the virtual machine (VM).
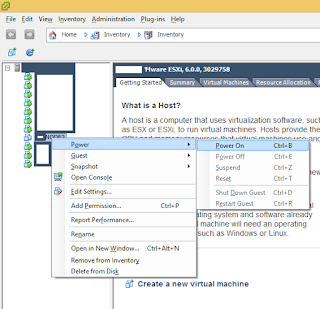
1. Go to the VMWare vSphere 6 client and select the VM , do a right click and start the VM.
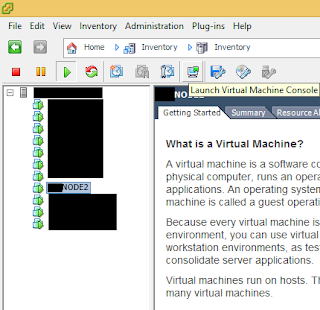
2. Now we need to launch the VM so that we can see it in console. On the vSphere client you would see a terminal with an arrow icon. Click on it to launch the VM console.
3. Inside the console you can use "Alt" + Enter to toggle the mouse between VM and your desktop.
After clicking on the VM Console press the 'I' key to start the installation or use the arrow keys and press enter.
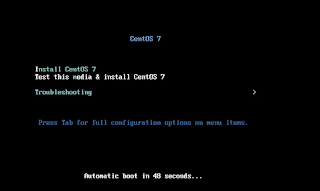
4. After a few minutes you would be presented the CentOS 7 installation start page.
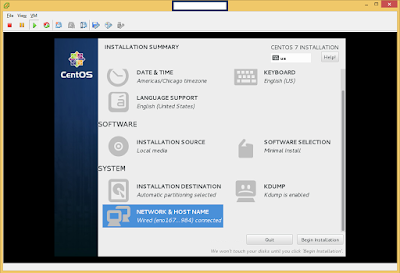
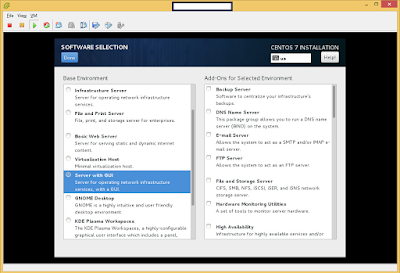
5. We can set these properties in any order. The important thing to note is that the Software selection is a minimal install so you won't get a UI, you need to change it to Server with UI to be able to use the UI.
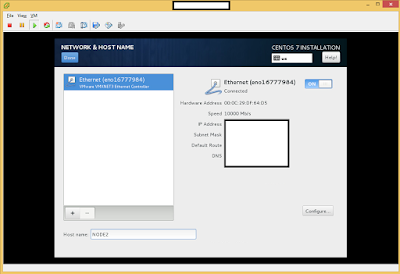
6. Setup Network by just sliding the bar to the on position. Make sure that you give a name to the machine in host name instead of the default. Make a note of the IP.
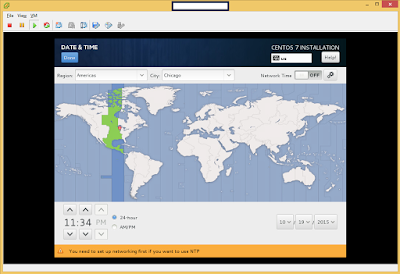
7. Setup the Date and Time. If you have setup Network first you can enable the network time else we could also do it later.
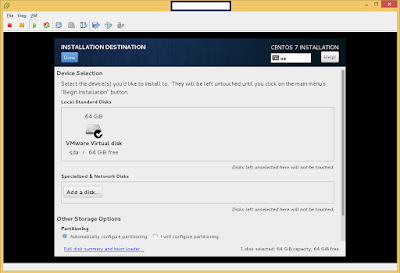
8. Setup Disk by just clicking on the disk icon
9. After all this is setup, click on the "Begin Installation" on step 4.
This would show the progress as well as ask you to create the root user password and other users.
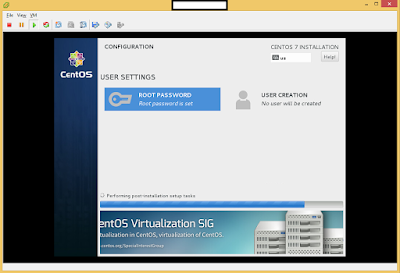
10. Do create another user who is an admin/root and do not use the root user for any of the interaction.
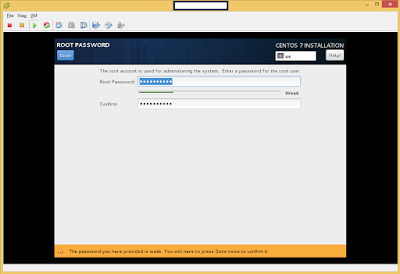
11. Create another Admin user, make sure you check the "Make this user administrator"
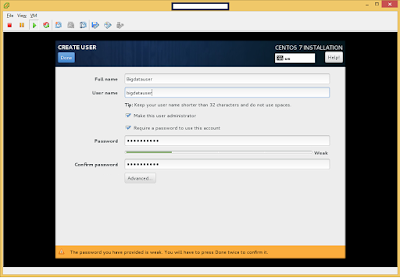
12. After installation is done it would ask you to reboot and you are can now either login through the console or use any SSH compliant client like putty or console in other Unix based OS and login to the VM using the IP on setup 6.
1. Go to the VMWare vSphere 6 client and select the VM , do a right click and start the VM.

2. Now we need to launch the VM so that we can see it in console. On the vSphere client you would see a terminal with an arrow icon. Click on it to launch the VM console.

3. Inside the console you can use "Alt" + Enter to toggle the mouse between VM and your desktop.
After clicking on the VM Console press the 'I' key to start the installation or use the arrow keys and press enter.

4. After a few minutes you would be presented the CentOS 7 installation start page.

5. We can set these properties in any order. The important thing to note is that the Software selection is a minimal install so you won't get a UI, you need to change it to Server with UI to be able to use the UI.

6. Setup Network by just sliding the bar to the on position. Make sure that you give a name to the machine in host name instead of the default. Make a note of the IP.

7. Setup the Date and Time. If you have setup Network first you can enable the network time else we could also do it later.

8. Setup Disk by just clicking on the disk icon

9. After all this is setup, click on the "Begin Installation" on step 4.
This would show the progress as well as ask you to create the root user password and other users.

10. Do create another user who is an admin/root and do not use the root user for any of the interaction.

11. Create another Admin user, make sure you check the "Make this user administrator"

12. After installation is done it would ask you to reboot and you are can now either login through the console or use any SSH compliant client like putty or console in other Unix based OS and login to the VM using the IP on setup 6.
No comments:
Post a Comment